References/links:
- Software: HP 7470A emulator from the KE5FX GPIB Toolkit
- Hardware: NI USB-GPIB-HS
- A collection of manuals and utilities for the 35665A from KO4BB
Until now in order to transfer a screenshot from my 35665A I needed to save it in a floppy and open it with the HP7470A emulator software as described here. The HP7470A emulator can work as a GPIB plotter only with NI's 488.2 drivers and the adapter needs to be device GPIB0. I tried to make it work with my Keysight 82357B with no success.
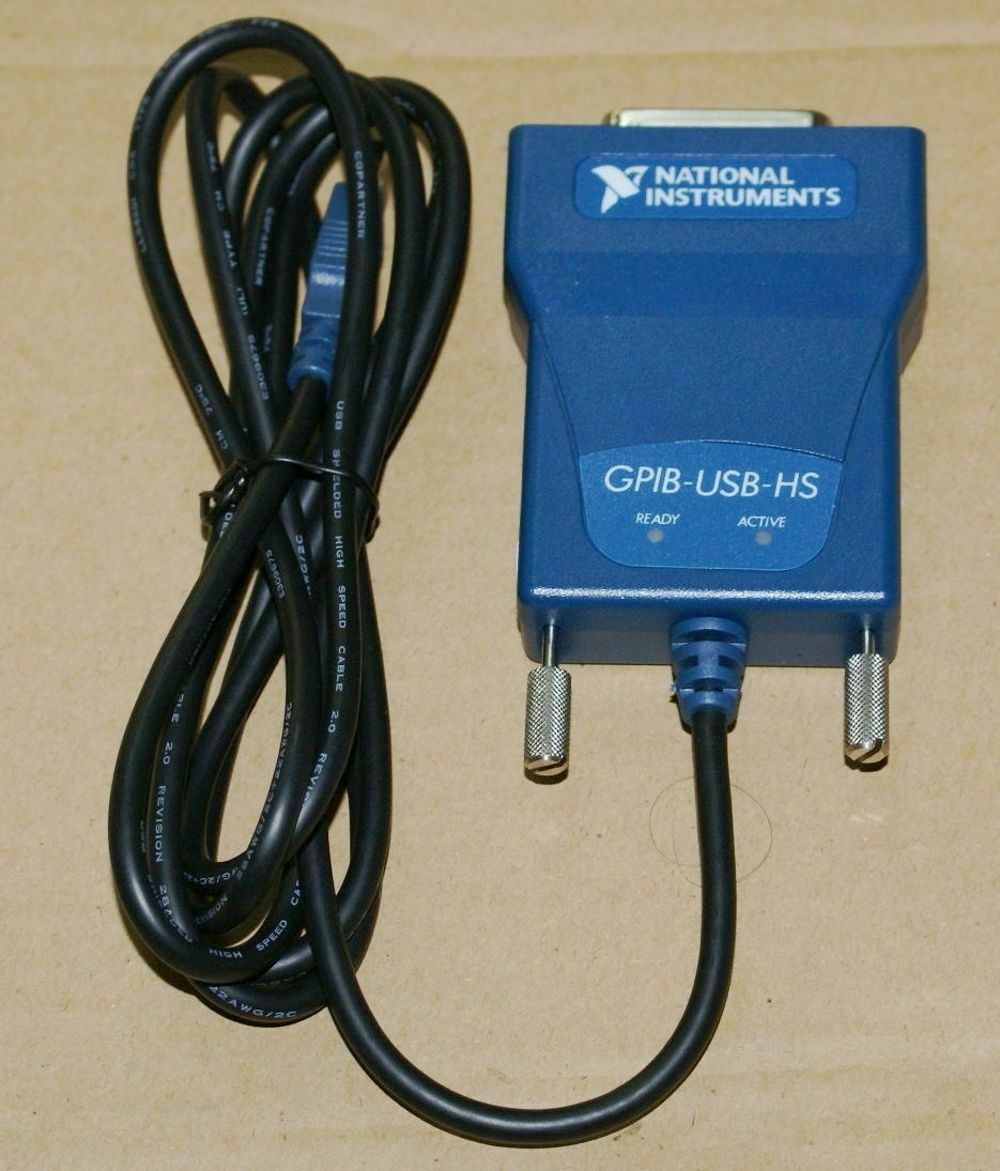
Both of my USB-to-GIPB devices are bought from eBay for less than 100 USD each. The Keysight one is definitely a copy but works just fine. The NI one looks original. Even the included CD is pressed (i.e. silver, not green at the bottom) and with a high quality print-job. Anyway it looks and feels original.
It took me some time so set everything up so I am writing this is a step-by-step guide hoping to save you some.
Preparing your computer
First install the 488.2 driver. I used version 16.0 included in the CD. Connect the USB-GPIB-HS adapter and launch NI MAX.
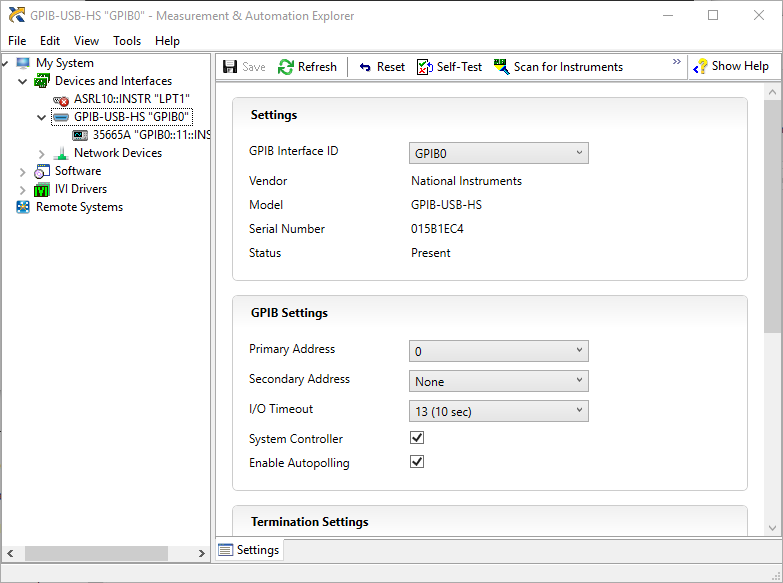
You should be able to see it under "Devices and Interfaces". If the GPIB interface ID is not GPIB0 change it. If you have a GPIB device connected to it click on "Scan for Instruments" to find it. This way you can also check if it is actually working.
You also need to install the amazing KE5FX GPIB Toolkit. This collection of programs makes you wonder why big companies can't make great software like this one.
Preparing the 35665A
Keeping with the tradition of HP manuals this is a[Hardkey], this is a[SOFTKEY](the buttons at the right of the screen) and this is a[SOFTKEY WITH AN OPTION]selected.
To setup the GPIB do the following:[Local/HP-IB] brinks up the GPIB menu[PLOTTER ADDRESS] [7] [ENTER] set the plotter address (7 is arbitrary)[SYSTEM CONTROLLR] puts the 35665A in controller mode
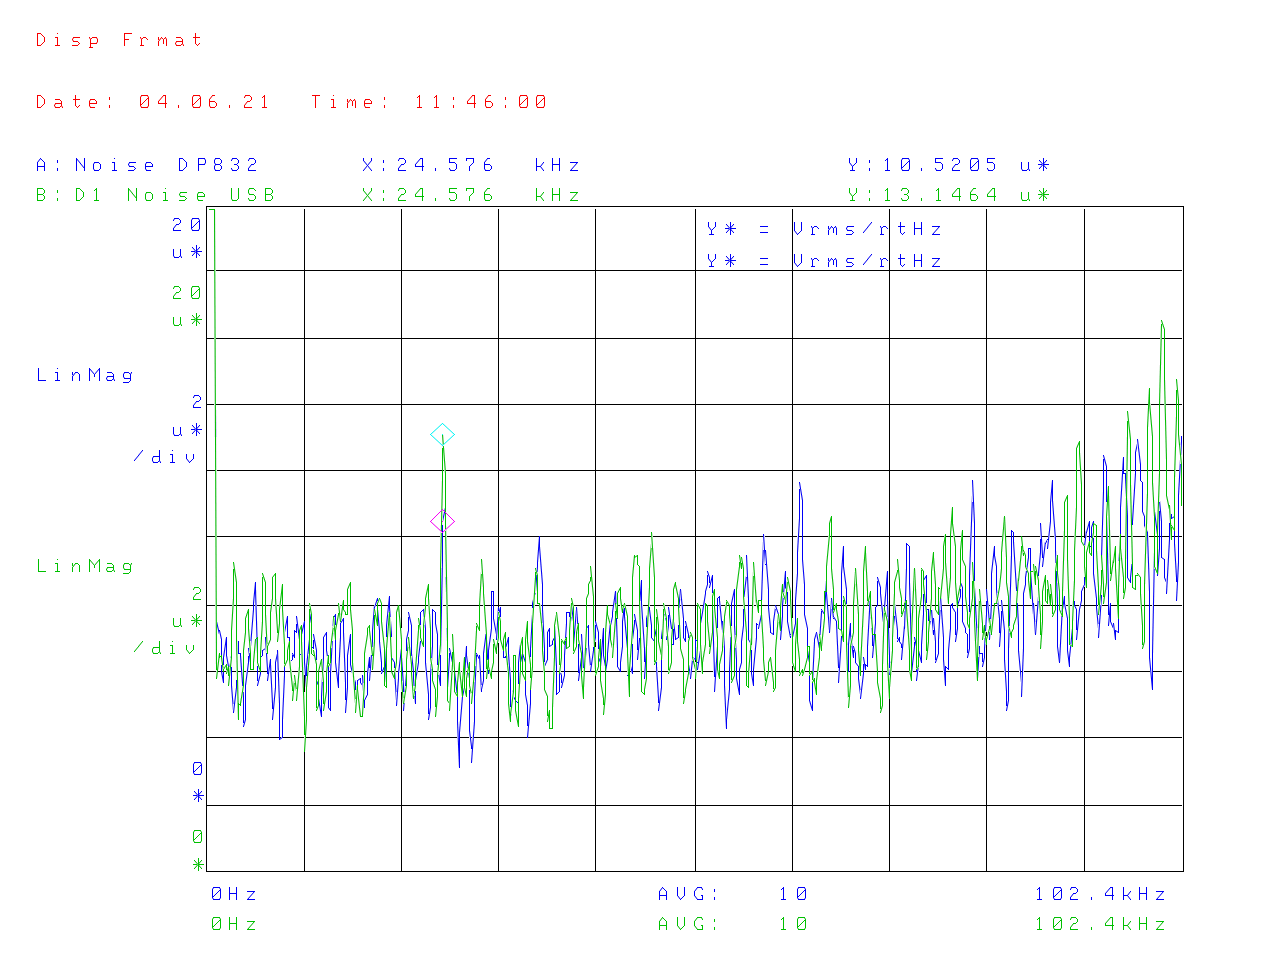
To setup the plot do the following:[Plot/Print] brinks up the plot menu[MORE SETUP] [OUTPUT TO HPIB FILE] make sure you have FILE selected [DEVICE IS PLOT PRNT] print is a screen dump and plot outputs the data[TITLE LINE 1] write a title for your plot if you wish (line 2 is also available) [RETURN]
Plotting
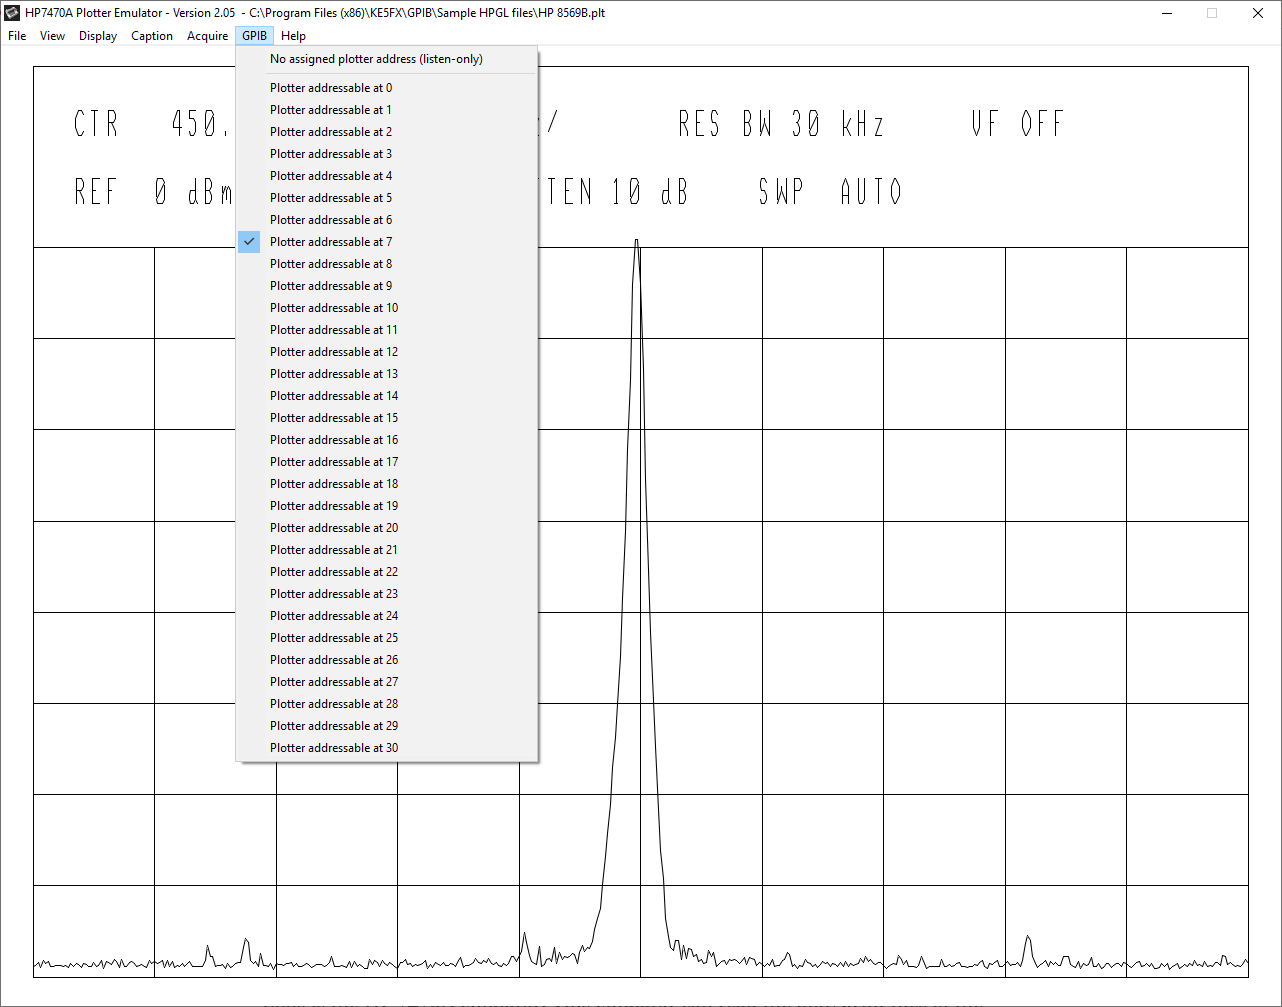
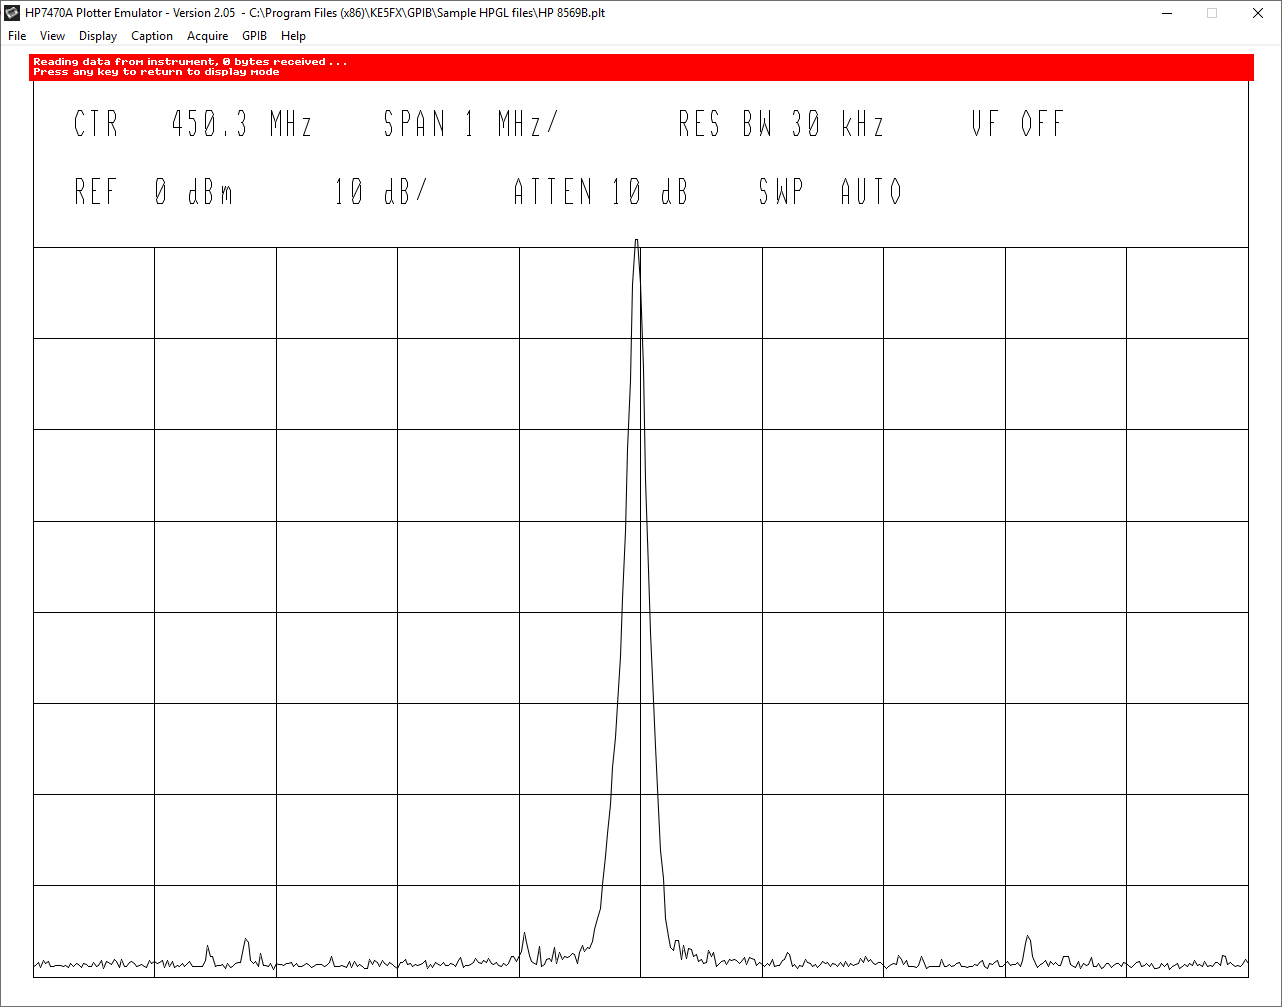
Launch the HP 7470A emulator and select the plotter address as shown in the image:
Now press w or click on Acquire > Wait for device-initiated plot
To send a plot from the 35665A press [Plot/Print] and [START PLOT/PRNT]
Your plot should arrive promptly.
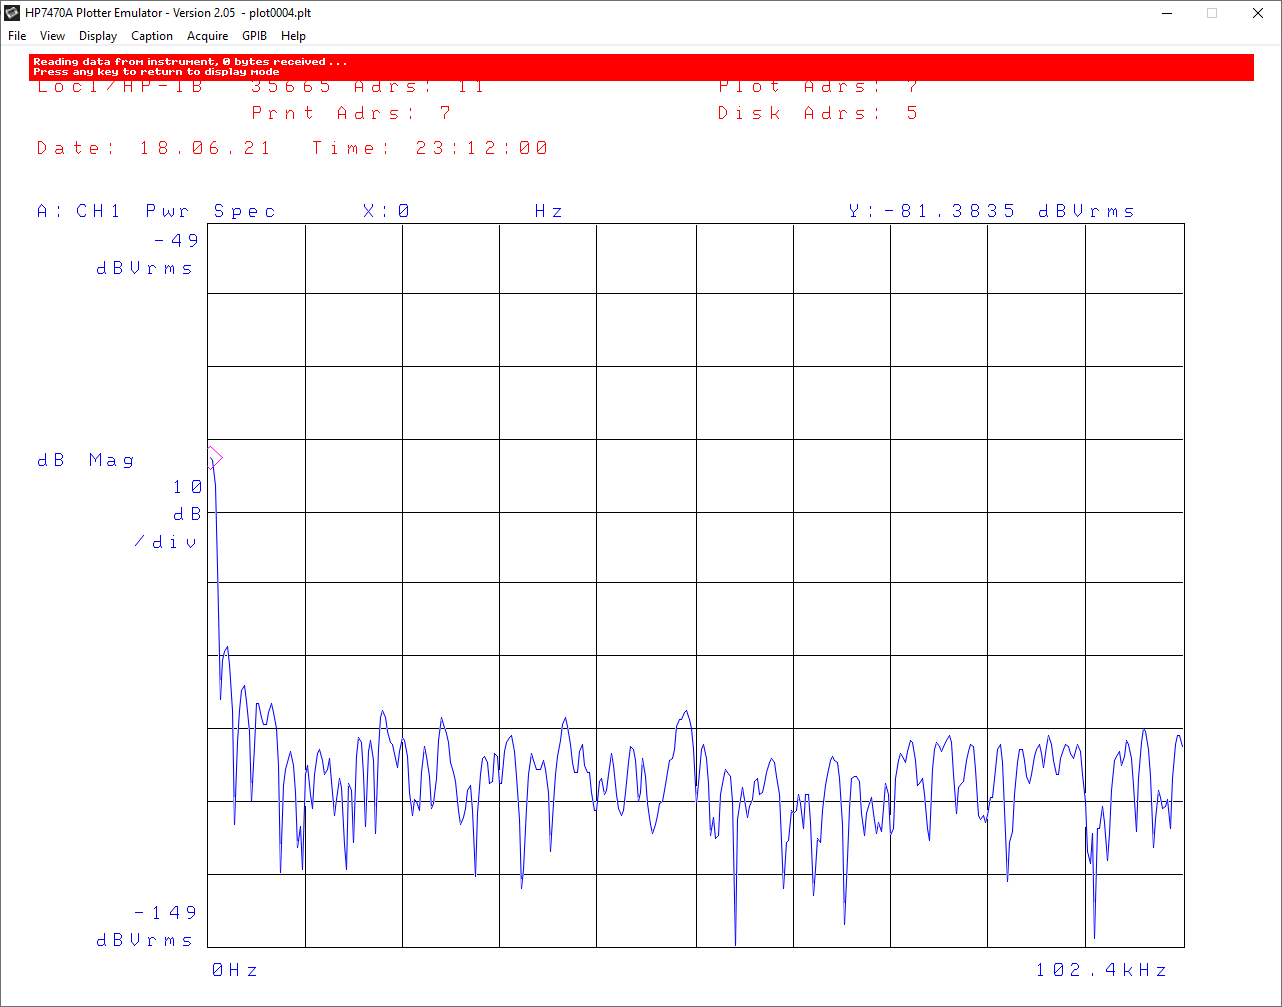
Now press any key to exit the wait mode and press s or click on File > Save image or HP GL/2 data... to save it.